

AutoNumbering captures client requirements and offers many options to set up the renumbering process. With it's intuitive design AutoNumbering will help you and your team in the automation process.
AutoNumbering provides multiple selection types (to chose the designated elements from the Revit model) and also extra filtering options.

The add-in provides an offline access which offers you 5 days access without an internet connection after which you have to log in. Each time you open the application while logged in the the number of days left for offline access is reset to 5. The first time you use the add-in you have to open the app while logged in to have this option.
You can buy multiple licenses from the same app store account and use the multi-seat distribution option to distribute the licenses along team members. The multi-seat distribution button is located under the MyDownloads section of the store.
AutoNumbering allows you to reduce workload on non-essential processes like spending time in setting up marks. The interface is intuitive with a linear approach from start to finish.
AutoNumbering offers the possibility to quickly target rooms, windows, doors or select a Family (or system family) and the type you want to renumber.
Step 1 – Selection Type – You can chose from Doors, Window, Rooms or Families. Each item provide the full set of options for the numberig process. The first 3 items have more filtering options since they target specific components but with the Families option you have access to most of the family types (custom and system) defined in your model.
Step 2 – Select a level – If the By Level was selected as the Selection Type , you can select a level from the Levels tab item. By default the first level is selected. The level you select here will determine what elements are chosen in the initial selection.
Step 3 – Initial Selection – The initial selection will show a table with the elements selected from the Revit Model. It’s called an initial selection because you will have in the next step the option to add filters to further refine this list. Each category will contain it’s own set of filters.
Step 4 – Filters – A filter will refine the Initial Selection list. All elements from the Initial Selection that don’t pass all the filters added will not be considered for the algorithm. If you chose not to add a filter you can continue with the Initial Selection as it is.
Step 5 – Filtered Selection – This list represent the final list that passed all the filters set at the previous step. This list will be considered for applying the renumbering strategies.
Step 6 – Strategy – A strategy defines a type of algorithm used. There are 3 strategies available with several more options for each algorithm
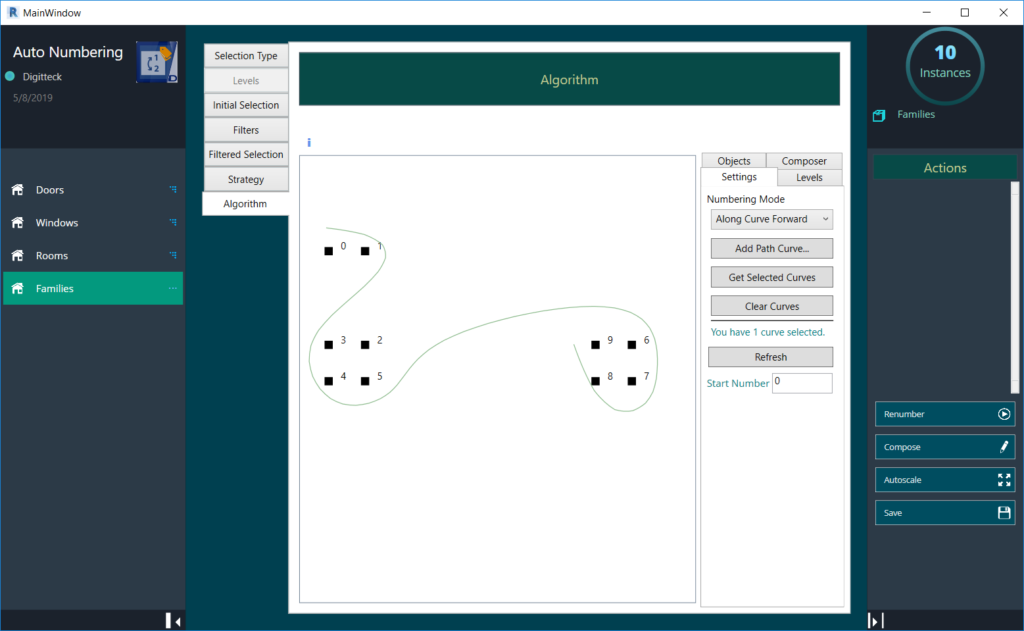
Step 7 – Algorithm – Based on the strategy selected the appropiate algorithm will be selected. This will perform the renumbering and it also provides lots of settings to tweak results.
Strategy Straight – Renumbering is made of the 2d plane by considering the 2 directions. First you chose if you want the numbering to be made from left-to-right (or backwards), then from top-to-bottom(or backwards)
Strategy Strips – This is similar to Strategy straight with an extra feature. You can portion your view to strip lanes and the algorithm is performed on each strip instead of going all the way from top to bottom
Strategy By Curve – You can select one or more curves on screen. The order of the selection is considered. Renumbering is made “along the curve” considering for each curve the closest element and numbering it accordingly
You can buy and download this app for only 29$
Our awesome tool will do the job for you. Focus more on the core concept and forget about the boring processes.
Write us for support and guidance. We will gladly answear your questions